Return to previous page
  • Overview
  • Specs
  • Cure
  • Chemical
  • Application
  • Video

NP1 Cove Master Vertical Epoxy Mortar | 100% Solids | High Build | 5 Colors

NP1 is a three component 100% solids epoxy mortar designed for vertical cove base surface applications.  The NP-1 has specially selected aggregate and ingredients to provide easy construction of cove bases with the use of a marginal trowel or other cove base application tools.

Complete your epoxy floor project with a great looking vertical cove epoxy using the NP-1 in one of 5 colors.

Available in 5 color options. Each kit has Part A, Part B and aggregate Part C.   Below are options:

.25 cu ft (32.5 lb) kit which covers 36 linear feet at 4″ high
.125 cubic ft (16 lb) kit which covers 18 linear feet at 4″ high
Sample size kit 3 lbs.

Also available in liquid only option in 1 gallon and 3 gallon 2 part kits.  Liquid only options can be used as a primer.

Application thickness depends on project requirements.  Apply the NP-1 at minimum 1/8″ thickness.

PRIMER: None required.  Suggest using NP1 liquid only option as primer (NP-1DG1 or NP-1DG3) comes in 1 gallon and 3 gallon kits and then apply NP1 with aggregate when tacky for best adhesion.

TOPCOAT: None required

NP1 Vertical Cove Epoxy Used?

  • Any vertical wall surface requiring a Cove finish

Why NP1 Cover Master Epoxy?

  • Easy construction of vertical cove bases
  • 100% Solids Commercial Grade Epoxy
  • High build formula
  • 5 color options
  • Comes as 3 part kit with aggregate or Liquid Only to add your own aggregate or NP1 can also be used as a primer

NP1 Cover Master Epoxy Colors

SPECIFICATIONS

Solids 100%
VOC <1 g/L (mixed)
Colors  Natural, Light Gray, Dark Gray, Red, Black
Recommended Film Thickness Minimum 1/8″ thick and as needed to form the cove base
Coverage Rate Depends on style or type of cove base applied
Packaging 32.5 lbs (.25 cu ft), 16.25 lbs (.125 cu ft), 3 lbs
Mix Ratio (32.5 lb kit) Part A .45 gallons, Part B .23 gallons, 26.5 lbs Aggregate
Shelf Life 1 year in unopened container
Heat Deflection 62.25 degrees C (145F) @ ASTM D648
Weathering Good (chalks)
Impact Resistance Excellent
Abrasion Resistance Excellent
Flexural Strength 15,000 psi @ASTM D790
Compressive Strength 14,575 psi @ASTM D695
Tensile Strength 9,200 psi @ASTM D638
Ultimate Elongation  3.1%
Viscosity Part A= 2,200-2700 cps, Part B 200-300 cps

CURE SCHEDULE

Pot Life – 0.25 cu ft mix 25-35 min
Recoat or Topcoat 6-10 hours
Light foot traffic 8-10 hours
Full cure (heavy traffic) 2-7 days

APPLICATION TEMPERATURE: 50-90 degrees F with relative humidity below 85%

CHEMICAL RESISTANCE

RATING
 acetic acid 5% B
 MEK A
 xylene C
 ethyl alcohol C
 skydrol B
 methanol A
 10% sodium hydroxide E
 50% sodium hydroxide E
 10% sulfuric acid C
 70% sulfuric acid A
10% HCI C
1.1,1 trichlorethylene B

Rating key: A – not recommended, B – 2 hour term splash spill, C – 8 hour term splash spill, D – 72 hour immersion, E – long term immersion.

MIXING AND APPLICATION INSTRUCTIONS

PRODUCT STORAGE: Store product in an area so as to bring the material to normal room temperature before using. Continuous storage should be between 60 and 90 degree F. Keep from freezing.

SURFACE PREPARATION: All dirt, oil, dust, foreign contaminants and laitance must be removed to assure a trouble free bond to the substrate. We recommend that an aggressive shot blast be performed prior to the application of this product. A less adequate method would be acid etching, but the etch should properly profile the substrate. All edges and around columns or beams should be mechanically scarified. All termination points should not be feather edged, but should be saw cut with the termination ending at the sawcut or blended into an applied epoxy floor overlay. All large cracks should be V cut and filled with appropriate crack filler. All expansion joints should be filled with appropriate joint filler. When overlaying an expansion joint, a single saw cut through the epoxy overlay will prevent random fracturing. A test should be made to determine that the concrete is dry; this can be done by placing a 4’x4’ plastic sheet and taping down the edges. If after 24 hours, the substrate is still dry below the plastic sheet, then the substrate is dry enough to start coating. The plastic sheet testing is also a good method to determine if any hydrostatic pressure problems exist that may later cause disbonding.

PRIMING: No primer is necessary. This material is self-priming. However, any suitable primer can be used.  Can use the liquid only NP1 as a primer to aid in application.  In some applications, primers such as our NP162 can be used to aid in application.

PRODUCT MIXING:  It is important that the liquids be mixed together first. Mix the liquids in an oversized container thoroughly and until streak free. After the liquids are thoroughly mixed, add in the aggregate. Mix in the aggregate with slow speed mixing equipment such as a jiffy mixer or rotating bucket/stationary mixing blade assembly. It is equally important that enough time is spent mixing in the aggregate to insure that the aggregate is thoroughly wetted out. No induction time is necessary. Improper mixing may result in product failure.

For best mixing results and proper blending of parts A and B, recommend a Jiffy Mixer style drill mixer.

Use of an improper drill mixer can result in streaking of the color because the pigment has not been thoroughly blended.  It can also create curing problems if the hardener also called activator (Part B) is not thoroughly blended with the resin (Part A) which can cause some areas on your floor to remain soft and not harden properly.  DO NOT USE A PAINT MIXER.  Many mixing problems described above can be traced back to using a paint mixer..  DO NOT HAND MIX as this approach can also result in the same problems as using a paint mixer.

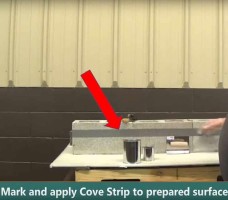
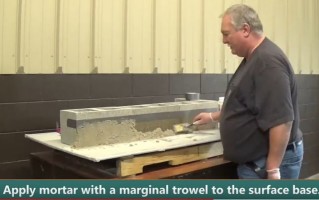
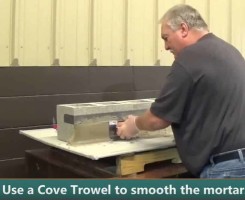
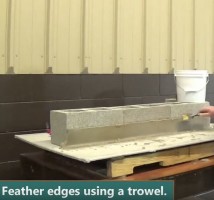
PRODUCT APPLICATION: (see application video) Apply the mixed material using a marginal trowel, cove base trowel or any other suitable application equipment at a minimum 1/8 inch thickness. Do not over trowel the material as this may cause isolated blisters to form. Maintain temperatures within the recommended ranges during the application and curing process.

RECOAT OR TOPCOATING: No recoating or topcoating is necessary. However, if you opt to topcoat the applied mortar, allow it to cure before topcoating. Many epoxies and urethanes can be used.

CLEANUP: Use xylol

SURFACE CLEANING: Caution! Some cleaners may affect the color of the floor installed. Test each cleaner in a small area, utilizing your cleaning technique. If no ill effects are noted, you can continue to clean with the product and process tested.

RESTRICTIONS: Restrict the use of the surface to light duty and non-harsh chemicals until the coating is fully cured (see technical data under full cure). It is best to let the surface remain dry for the full cure cycle. Dependent on actual complete system application, surface may be slippery, especially when wet or contaminated; keep surface clean and dry.

LIMITATIONS

  • Colors or clarity for clear may be affected by high humidity, low temperatures, or chemical exposure.
  • For best results use a high quality 1/4” nap roller.
  • Color or gloss may be affected by environmental conditions like humidity, temperatures, chemicals, or exposure to lighting such as sodium vapor lights.
  • Mortar Colors are different from colors used for other epoxies.  Colors may vary from batch to batch due variations in the silica filler.
  • For chemical exposure areas, we recommend a suitable topcoat to reduce porosity and chemical migration.
  • Substrate temperature must be 5°F above dew point.
  • All new concrete must be cured for at least 30 days.
  • Apply a suitable primer before using this product.
  • Physical properties are typical values and not specifications.

NOTICE TO BUYER: DISCLAIMER OF WARRANTIES AND LIMITATIONS ON OUR LIABILITY We warrant that our products are manufactured to strict quality assurance specifications and that the information supplied by us is accurate to the best of our knowledge. Such information supplied about our products is not a representation or a warranty. It is supplied on the condition that you shall make your own tests to determine the suitability of our product for your particular purpose. Any use or application other than recommended herein is the sole responsibility of the user. Listed physical properties are typical and should not be construed as specifications. NO WARRANTY IS MADE, EXPRESSED OR IMPLIED, REGARDING SUCH OTHER INFORMATION, THE DATA ON WHICH IT IS BASED, OR THE RESULTS YOU WILL OBTAIN FROM ITS USE. N0 WARRANTY IS MADE, EXPRESSED OR IMPLIED, THAT OUR PRODUCT SHALL BE MERCHANTABLE OR THAT OUR PRODUCT SHALL BE FIT FOR ANY PARTICULAR PURPOSE. NO WARRANTY IS MADE THAT THE USE OF SUCH INFORMATION OR OUR PRODUCT WILL NOT INFRINGE UPON ANY PATENT. We shall have no liability for incidental or consequential damages, direct or indirect. Our liability is limited to the net selling price of our product or the replacement of our product, at our option. Acceptance of delivery of our product means that you have accepted the terms of this warranty whether or not purchase orders or other documents state terms that vary from this warranty. No representative is authorized to make any representation or warranty or assume any other liability on our behalf with any sale of our products. Our products contain chemicals that may CAUSE SERIOUS PHYSICAL INJURY. BEFORE USING, READ THE MATERIAL SAFETY DATA SHEET AND FOLLOW ALL PRECAUTIONS TO PREVENT BODILY HARM.

Installing NP-1 Cove Master Vertical Epoxy

Reviews